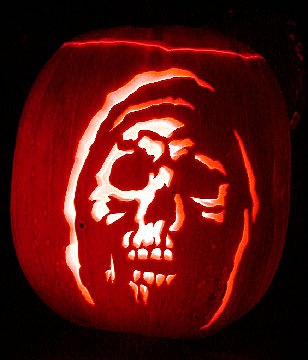
The Art of Pumpkin Carving


Pumpkin carving can be very fun, and yet very artistic. Which
ever you choose to make it will be up to you, but this page will show you a
number of different ways to do either. This will tell you all of the different
tools you will need to get started carving, and take you step by step through
the process.
Here are the tools you will need:
- Scraper: Ice cream scoop, large spoon, or special
pumpkin scraper scoop tool for cleaning out the pumpkin
- Pumpkin Poker: Nail with tape on end to create
handle or specialty poker tool for transferring the patterns onto the pumpkin.
A push pin can also be used but it may not penetrate deeply enough into the
pumpkin shell.
- Hand Saws: You will need a few different hand
saws
- Large Saw: With blade approximately six inches
long by ½ to 1 inch wide for major cutting like the lid. The lid can also be
cut with a knife.
- Medium Saw: With blade approximately two inches
long by 1/5-inch wide for cutting larger sections of the pumpkin pattern.
- Small Saw: With blade approximately two inches
long by 1/8-inch wide for cutting smaller sections of the pumpkin pattern.
- You can make the medium and small saws by fashioning a handle onto a
jigsaw blade using tape. Make sure that blade will not cut you when it is
used.
- Drill Bit: A drill bit or specialized pumpkin
drill
-

- Power Tools: Yes, you can use small power tools
for carving pumpkins. Small hand tools, such as Dremel tools, with spiral saw
blades can reduce the work of sawing.
Step 1) Preparation
For easy cleanup, place your pumpkin on several layers of newspaper before
carving. Clean the outside of the pumpkin with a rag moistened with water to
remove dirt and debris.
Step 2) Draw and Cut Lid
Cut a six-sided lid, big enough so you can reach in and clean out all the
pumpkin gunk. Angle a saw or knife toward the center of the pumpkin to create a
ledge that supports the lid. Make sure the hole is large enough to reach in and
pull out the seeds and stringy stuff. The bottom of the pumpkin could also be
cut off instead; this will allow the pumpkin to sit up straight and make
removing the seeds easier.
Step 3) Clean and Scrape
Using the flat-edged ice cream scoop or the special pumpkin scoop to clean out
the seeds and strings. Where you plan to carve, scrape the pumpkin wall until
it's about one inch thick. If carving a challenging pattern, scrape the pumpkin
so that the wall is about one-half inch thick.
Step 4) Print and Attach Pattern
Select a pattern you want to carve, many patterns can be found on the internet.
Check the carving difficulty to make sure you want to carve that pattern. Print
the pattern and tape or pin it to your pumpkin. If you use pins, place them
on the design lines so you don't end up with holes you don't want!
The pattern may need to be slightly folded to fit on a rounded pumpkin. Fold the
pattern so that the pattern lines match up.
If the pattern is too large or too small, you can use a copier to reduce or
enlarge.
Step 5) Transfer Design
Using a pushpin, or a poker tool, make pinpoint marks along
the design lines. Check to see you have transferred the design completely, then
take the pattern off the pumpkin.
Step 6) Saw Design
Using the carving saws saw dot-to-dot using a gentle up and down motion. Saw
gently, the saws can break if they are forced.
- Learn Sawing Skills: To learn sawing skills, hold
the pumpkin in your lap. Hold the saw like a pencil and saw steadily with a
continuous up-and-down motion. Saw at a 90-degree angle to the pumpkin. Use
gentle pressure. Saws are breakable if used incorrectly.
- Saw Dot to Dot: Saw dot-to-dot, following your
pattern. Work from the center of the design outward. Remove and reinsert the
saw to make corners.
- Smallest Pieces First: Saw and remove smallest
pieces first. Push the cut pieces out with your finger, not the saw blade.
- Drill the Small Holes: Small holes (such as
pupils of the eyes and stars in a flag) should be drilled, not sawed.
- Long Thin Sections: With long thin sections, you
can drill closely spaced holes if you have difficulty sawing or removing the
section.
Step 7) Locate
the Chimney
Locate and cut a chimney for the candle. If a flashlight or battery candle is
used, a chimney is not needed. Place the candle in the bottom of the pumpkin. If
candle does not stand on its own, place it on a small, non-flammable plate or
bore a small hole in the bottom of the pumpkin to hold the candle.
Now you can put your pumpkin out on the front porch for everyone to admire.
Remember be safe and have a Happy Halloween!